Manual OSS Installation and Configuration of My NonStop
The default method of installation assumes that the user who is performing the installation has write permissions in OSS space too. If the user performing My NonStop & WVP E installation does not have permissions to create a directory on OSS or write to it, the installation will fail since the default installation automatically uses the same user to perform the OSS side of install.
If the above-mentioned scenario is true in your case, you can use this manual method of installation.
This method allows the user to install the guardian part first and provide instructions to manually proceed with the OSS portion. Once the user completes the OSS steps, the installation will resume with the next steps.
First, you logon to TACL using your login credentials. Then, to begin the installation process, transfer the MYNSPAK and INSTMYNS files from WS_SW/WVPE Installation folder to your Guardian Subvolume where you want My NonStop to be installed and running.
Next, run the setup program with the manual OSS suffix in the instruction:
> RUN INSTMYNS MANUAL_OSS
In this first installation phase, the setup program i.e. INSTMYNS asks for the preliminary information that it needs to begin the installation of My NonStop. A setup wizard prompts you for the following information:
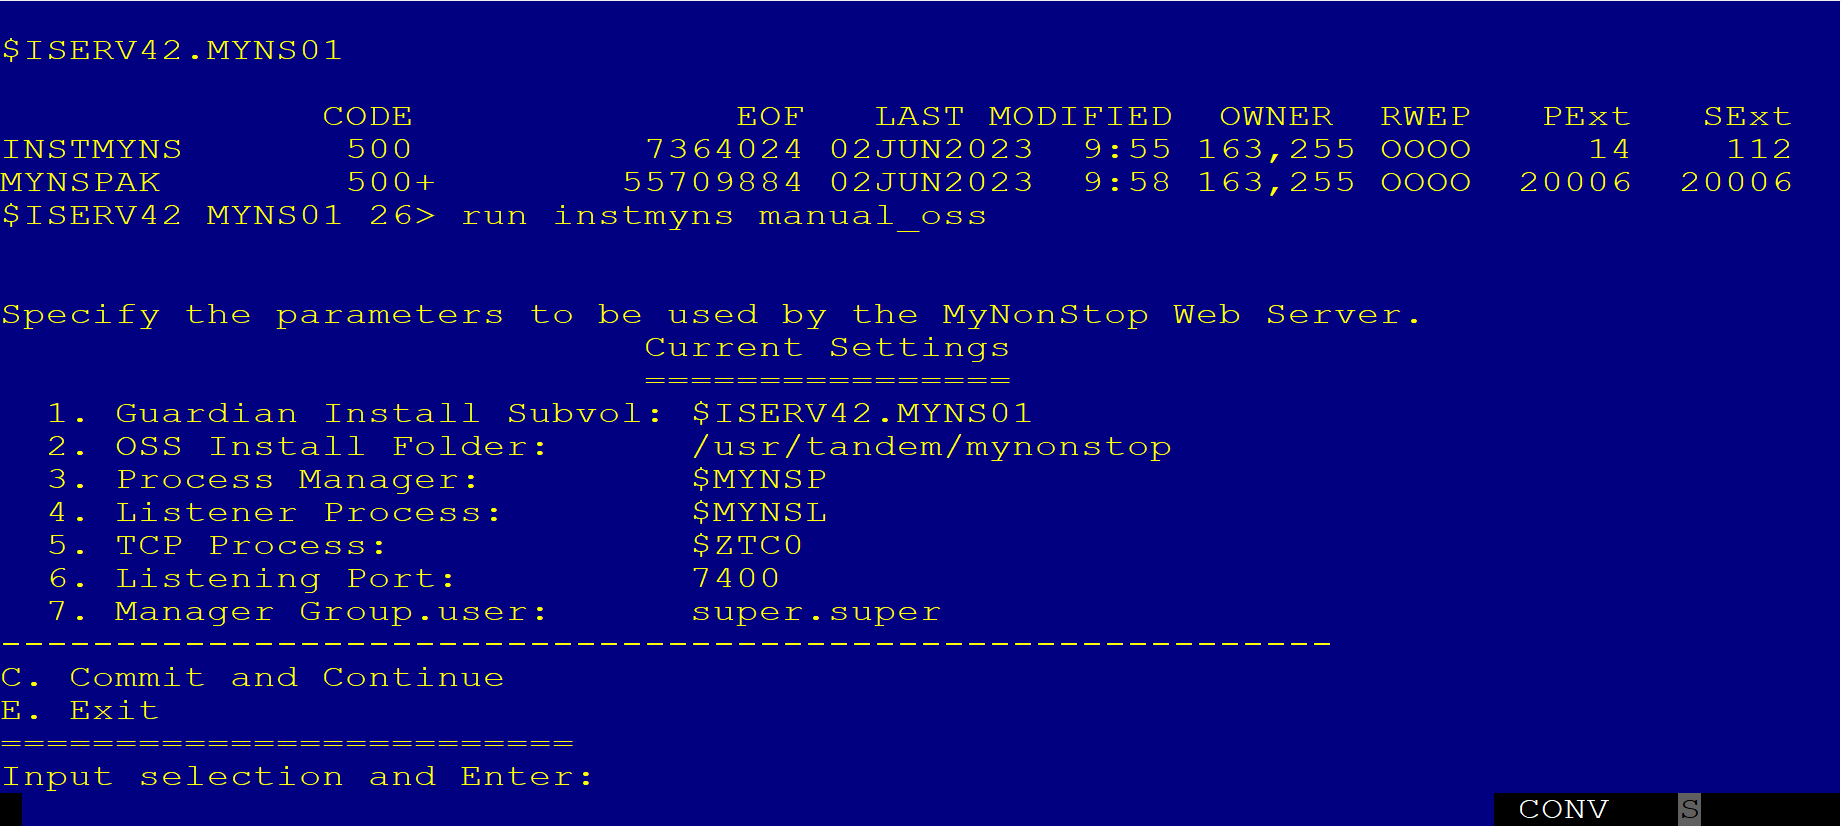
- Guardian Install Subvol – $VOLUME.SUBVOL where you want to install My NonStop.
Default. It picks up the location where you transferred the My NonStop files to.
Note: Make sure that this location is the same as where you transferred the files to and ran the INSTMYNS from.
- OSS Install Folder – OSS folder in which the MYNSUI UI files should be copied to.
Default. /usr/tandem/mynonstop
- Process Manager – Process name used by Process Manager.
Default. $MYNSP
- Listener Process – Process name to be used by Listener MYNSLNR.
Default. $MYNSL
- TCP Process Name – TCP stack to be used by MYNSLNR.
Default. $ZTC0
- Listening Port – Port on which MYNSLNR should listen on.
Default. 7400
Options. 1025 – 65535
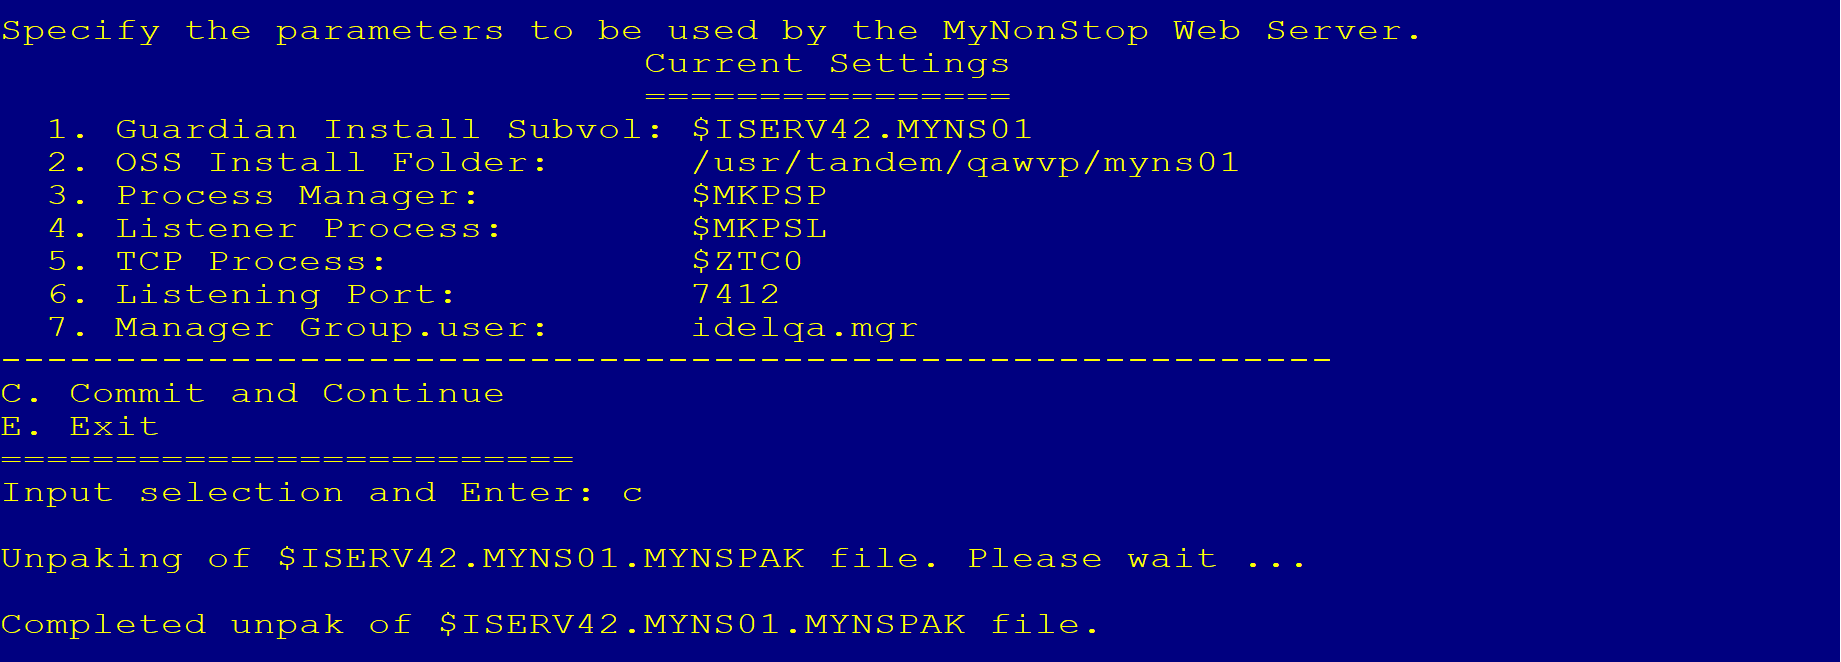
- Manager – Group.user who you want to be the Manager of My NonStop & Web ViewPoint Enterprise i.e. with all Administrative privileges.
Default. SUPER.SUPER
Note: You can use any valid group.user to install and set as a Manager. Note, that this is the same user who will be used to install WVP E.
Once the user inputs the information and enters C (Commit and Continue), the files are extracted.
And then the user is asked to perform the following steps in the OSS space:
> cd /usr/tandem/<mynonstop_foldername>
> mkdir <mynonstop_foldername>
> chown -R IDELQA.MGR:IDELQA <mynonstop_foldername>
> cp -p /G/ISERV42/MYNS01/mynsui <mynonstop_foldername>/mynsui.tar
> cd /usr/tandem/<mynonstop_foldername>
> tar -xvf mynsui.tar
> cd /usr/tandem/<mynonstop_foldername>/assets/data/definitions
> cp -p /G/ISERV42/MYNS01/mynsyaml mynsyaml.yaml
Note that it is advised to carry on these steps in a new TACL session so that the user can simply come back to this initial session later and continue with the installation.
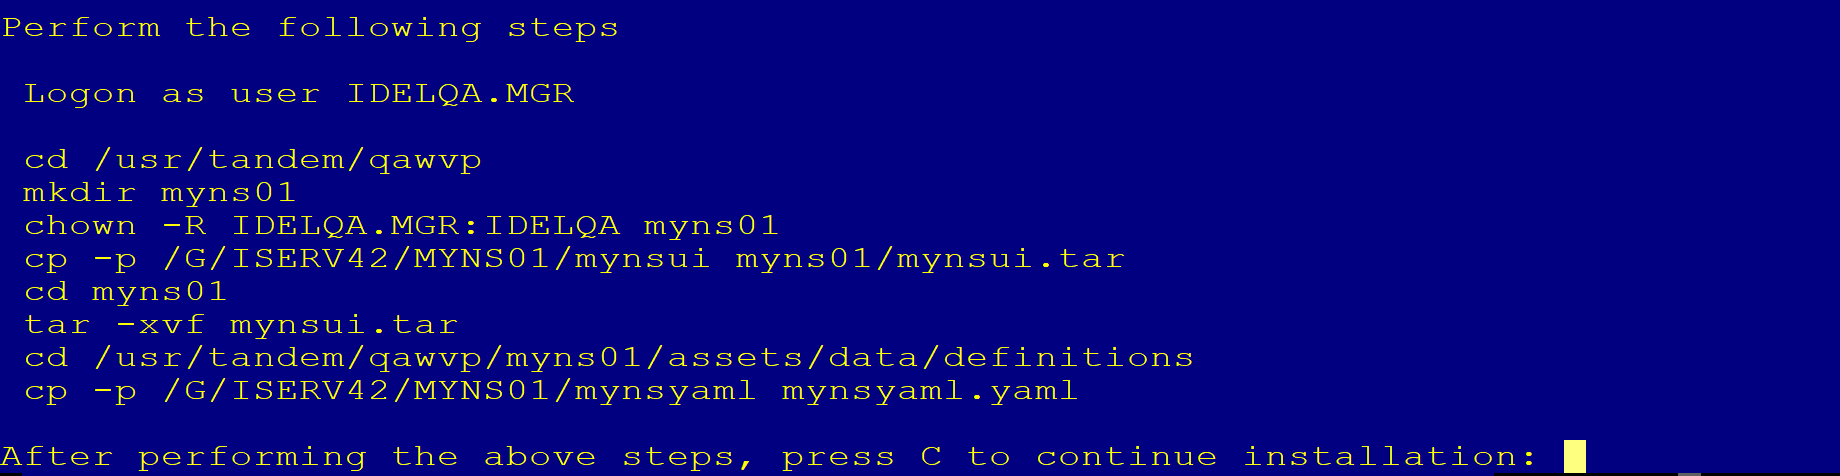
Once all the steps are completed, the user can go back to the initial session, press C to commit, and install My NonStop.

Upon completion of installation and grant of permission for starting the My NonStop instance, a user is presented with a secure URL to access and logon to My NonStop.
